June 16, 2023
A shower leak can be a frustrating and costly problem for homeowners. Not only does it waste water, but it can also lead to structural damage and mold growth if left untreated. Identifying the cause of the leak is crucial in order to apply the appropriate fix and save you from expensive repairs down the road.
In this blog post, we will explore the common causes of shower leaks and provide you with practical solutions to address them. By understanding the underlying issues and following the recommended fixes, you can prevent further damage and enjoy a leak-free shower experience. Let us help you put an end to annoying leaks and unexpected water damage before they become disastrous for both your comfort space and your wallet.
Identifying Causes of Shower Leaks
Shower leaks are a common problem that can cause significant damage to your bathroom. While most homeowners tend to ignore this issue, identifying the cause of a shower leak as early as possible is crucial to prevent irreparable damage and maintain the integrity of your home. Some of the common causes of shower leaks include cracked tile grout, faulty shower faucets, leaking shower bases, waterproofing failure, silicone degradation, poor shower hob design, hairline cracks in shower trays, and tiles that need resealing.
One of the most common causes of shower leaks is cracked tile grout, which can lead to water seeping through to the underlying layers of your shower floor and causing structural damage. The grout and caulk around the shower tiles act as a protective barrier. However, over time, grout can crack or deteriorate, and caulk can develop gaps, leading to water shower leaks.
Another major cause of shower leaks is drainage issues. Blocked or damaged drainage pipes may backlog water up into your bathroom and wet areas, increasing moisture levels that could promote mould growth and make your bathroom (and your home too) unwelcoming. Aside from damaged pipes, poorly designed drainage could also hinder proper flow, leading to water buildup and consequently causing leaks.
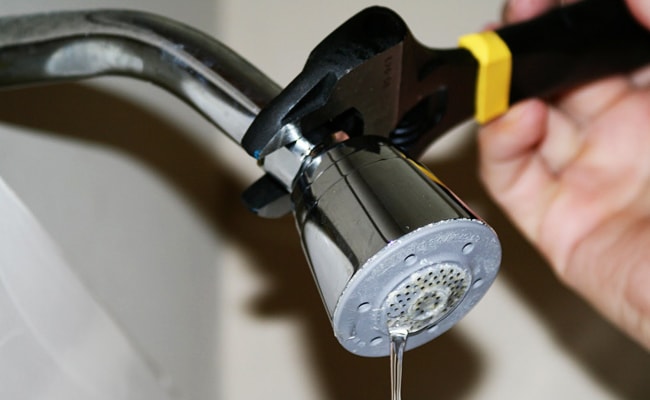
Last but not least is a faulty shower faucet. This is another common culprit behind shower leaks. A shower faucet has various mechanical components that wear out and weaken over time. When these washers or seats become worn out or corroded, they lose their ability to seal tightly, causing water to seep through the sides of the valve and drip into the washroom.
Some homeowners choose to overlook a seemingly harmless hairline crack, tile grout or drainage issues as they believe they do not pose any severe risks; after all, it’s just a little bit of water seeping through. However, this isn’t always true! Even small amounts of water can damage building materials like wood studs and sheetrock over time. Just because you ignored it today and it got better a few days later does not mean that the problem is already solved. Sooner or later, the shower leak will come back and, hopefully, it won’t be too late to fix it by then.
Inspecting Shower Faucet Seals
Most showers have multiple valves, each with its own set of seals and gaskets. The gaskets inside the stem of the valve become brittle with time. A good way to tell if your shower faucet is problematic is by listening to a dripping sound. If you notice water oozing out from under the handle of the tap, this could be due to a defective cartridge that controls the flow of water on a single lever tap. Over time, debris can accumulate, leading to clogging or seal damage. Other signs of a faulty shower valve include persistent dripping even when the shower is turned off or difficulty in fully shutting off the water.
Assessing Shower Tiles and Grout
Cracked tile grout can occur for several reasons, such as incorrect installation, high foot traffic, or even expansion and contraction in tile joints due to changing temperatures. Moreover, cracked tiles around the drain or along the walls could also become a contributing factor to shower leaks. As homeowners, it’s really important to address any tell-tale signs of cracking, peeling or discoloured grout early enough before water damage occurs.
To assess your shower tiles and grout, inspect them for cracks or holes that allow water to seep through. You can check whether the tiles are firmly attached to the wall by tapping them gently. If they feel loose, they may need a replacement. Another critical aspect to look out for is the grout lines between the tiles. Crumbling or discoloured grouting indicates that there is moisture in the walls behind the tiles, which could result in more severe problems down the line. Ensure that you inspect all corners and angles since these are common areas where tiny leaks may occur.
Fixing Common Shower Leak Issues
Resealing Baseboard Tiles
Baseboard tiles are often forgotten when it comes to shower maintenance and waterproofing, yet they are critical in preventing leaks. Failing to reseal them can lead to water entering the drywall or subfloor, causing further structural damage and mould growth. In most cases, resealing involves removing old caulk and replacing it with new caulk. It is a rather straightforward process that requires only a few tools and materials.
Firstly, remove any old caulk with a putty knife or scraper. Next, clean the surface area thoroughly with soap, water, and a sponge or rag. Allow time for the area to dry completely before applying the new caulk. Use a caulking gun loaded with waterproof silicone or acrylic latex caulk (depending on your tile material) and apply it evenly along the joint between the tile and the wall or floor. Smooth out any excess caulk with your finger or a caulking tool, then let it cure according to the instructions provided on the label.
Repairing Shower Faucets
Faucet leaks can range from minor drips to significant water waste and even water damage if left unnoticed. Identifying which part of the faucet is leaking is the first step in understanding how to repair it properly.
To fix a leaking shower faucet, start by turning off the main water supply to the house. Next, inspect the faucet assembly for worn-out or damaged components such as O-rings, washers, cartridges, and valve seats. Depending on what you find, you may need to replace some of these parts- it’s best to consult the manufacturer’s instructions or seek professional help if unsure.
When you’re ready to begin the repairs, start by disassembling the handle and any other trim pieces attached to your faucet assembly. You may find a set screw securing the handle onto the valve stem that needs removal before sliding off the rest of the trim. Then, use an adjustable wrench or pliers to remove the valve cartridge from the valve body, making certain to keep track of any components such as springs or pins. Clean any buildup on these parts with a wire brush before reinstalling them, ensuring proper alignment.
While DIY solutions for fixing shower faucets are possible, it’s best to involve professionals if you’re not experienced with plumbing repairs. Attempting to fix your faucet without appropriate knowledge and tools can lead to further damage or even personal injury. However, minor issues such as cleaning and replacing O-rings, washers or cartridges can often be done by referring to the manufacturer’s instructions.
Addressing Clogged Waste Lines
When your shower drain becomes clogged, water may back up and overflow, leading to flooding and water damage. Imagine taking a shower only to find that your feet are submerged in ankle-deep dirty water. Gross! This situation is more than frustrating, but it’s also a sign that you have a clog issue that needs addressing.
To fix this problem, start by pouring boiling water down the drain, followed by baking soda and vinegar solution. Wait for about 10-15 minutes before washing out with warm water or using a plunger to push down any remaining debris. If the problem persists, use a snake tool to remove any trapped hair or other debris blocking the pipe. Alternatively, you can call in a professional to help inspect the waste line and locate any more severe blockages.
Unclogging Shower Drain
Clogged waste lines are a major cause of shower leaks that can lead to costly repairs if left unaddressed. Excess hair and soap scum are common culprits for blockages, which can eventually cause water to back up into the shower and damage your plumbing and bathroom flooring or walls. In fact, clogged waste lines can become so severe that they can result in major pipe bursts or flooding- neither of which you want to deal with!
A friend of mine once had a problem where her shower was slow-draining all the time. She ignored it for months, thinking it wasn’t a big deal, but it eventually got so bad that she couldn’t use the shower at all without risking water damage. The plumber she called found that her waste line was so clogged with hair and other debris that he had to remove and replace it entirely- a process that cost thousands of dollars. Imagine paying so much money for products and a professional service you could have prevented!
If you find yourself in the same situation, one common solution is using a store-bought drain cleaner. While these products may work temporarily, they are typically not recommended by professionals due to their harsh chemical composition which can corrode pipes over time. Instead, more natural methods like baking soda and vinegar solutions are recommended. Some people also advocate using DIY snake tools or “plumbing augers” to clear out clogs in showers and sinks. Although they may work for minor blockages, these tools are not always effective against serious buildups- especially if the source of the clog is deep in your plumbing system. At the end of the day, seeking advice from experts and professionals is still the best option to go.
Preventative Measures for Shower Leaks
A leaking showerbase is such a pain in the eyes. And the more you take it for granted, the worse it gets. Why would you even waste paying unnecessary expenses for the water waste when you can simply have it fixed or do it yourself? Fortunately, there are several preventative measures you can take to minimize the risk of shower leaks. By implementing these measures, you can certainly enjoy a leak-free showering experience and ensure the longevity of your bathroom.
Install a shower liner: Shower liners act as an additional layer of protection against water damage. They help keep water from seeping into the walls or floors. Any small leak that may occur is easily fixed by removing the liner instead of replacing the tiles. Pro tip: When selecting a shower liner, choose a high-quality shower liner made of durable materials such as PVC or vinyl. These types of materials are resistant to water and provide an additional layer of protection against leaks.
Apply sealant: Applying silicone sealant around faucets, drain pipes, and edges of the shower base can help prevent water penetration. Look for a product that is waterproof and mold-resistant to ensure long-lasting protection. Periodically check the sealant for any signs of cracking, peeling, or deterioration. If you notice any issues, promptly remove the old sealant and reapply a fresh layer. Regular maintenance and inspection will help ensure that the sealant continues to provide effective protection against water penetration.
Regulate water pressure: Water pressure that is too high can cause stress on plumbing fixtures, leading to weakened seals or valves. On the other hand, low water pressure can lead to sediment build-up in pipes, causing clogs and resultant leaks. Installing a pressure regulator helps prevent excessive stress on plumbing fixtures, valves, and seals.
Consider tile placement: Unevenly placed tiles will create gaps between them that will allow water penetration, causing damage to surfaces below them. Before beginning the tile installation process, careful planning and unique slopes and irregularities must be considered. Select a high-quality tile adhesive and grout that is specifically designed for wet areas, such as showers. Adequate adhesive and grout coverage helps create a waterproof barrier and minimizes the risk of water penetration.
Frequently Asked Questions
How can you tell if your shower is leaking?
There are a few tell-tale signs that suggest your shower may be leaking. One of the most obvious signs is water pooling on your bathroom floor after you’ve showered. This could indicate that water is escaping through gaps in your shower enclosure or pan. Another sign is a musty odour emanating from your bathroom, which could indicate hidden mould caused by water damage.
What should be done to prevent shower leaks from occurring in the first place?
First and foremost, it’s important to make sure that all plumbing and fixtures are installed properly. A recent study found that over 80% of shower leaks were caused by faulty installation or poor workmanship. The damage water can do to your property is well documented. But the damage caused by using someone who doesn’t know what they’re doing can be an even BIGGER risk.
As homeowners, it is important to work with service providers who already have proven and tested experience in their craft. Do not simply trust everything you see on Google or any social media platforms. Pick up the phone, call the numbers provided, insist on speaking to an expert tradesman, not a sales rep. Talk to someone who has gotten their hands dirty fixing problems that you’re trying to solve. Speak to an expert, like Arthur from Shower Care who has over 35 years of experience in the Melbourne building industry. Only then will you be able to assess whether or not they are capable.
In addition to proper installation, regular maintenance can also help prevent leaks from occurring. This includes checking for loose tiles or grout, ensuring that water drains properly, and cleaning showerheads regularly to prevent clogs. Finally, homeowners can invest in high-quality materials and products designed specifically for wet areas like showers. This can include waterproofing membranes, water-resistant backer boards, and moisture-resistant drywall.
When is it time to call a professional to handle a shower leak?
If you have never attempted any plumbing-related repairs before, it’s always best to stay cautious and consult with professional shower repair experts like ShowerCare. Attempting to fix a complicated shower leak on your own could result in further damage or the need for even costlier repairs down the line. While some minor shower leaks can be fixed without professional assistance, it’s wise to bring in an expert if you lack experience or previous attempts to fix the issue have been unsuccessful. By doing so, you could save time and money while conserving precious resources.
Never ignore a leaking shower! Repair your leaking shower today to avoid long-term damage to your property and further costly repairs. Keep your shower area dry, safe, and hygienic by engaging Shower Care for your shower repair.